My Ibanez RX240

I bought this guitar used off my friend Holly for $100. It helped me serve God in music, but alas it was cheap and of poor quality. (Not Holly's fault).
Needing Some Tender Loving Care
I always had string issues with it. It
seemed that the intonation was suffering. I performed a
tune-up on it. However, the pickups are sort of low
quality. Well, actually, I'll just say it: they suck!
:) After I got my ESP guitar and installed Seymour Duncan
pickups, I realized what I was missing. So after about a
week of research, I decided on a combination Classic Stacks and a
JB bridge pickup from Seymour Duncan (courtesy of Lew's Guitar Shop).Disassembly
Here are some random shots of the disassembly process. This is how it looks basically gutted. The cavities are lined with conductive paint, but overall the quality of their work seems to be lacking. Was this a starter-pack guitar? Hmm....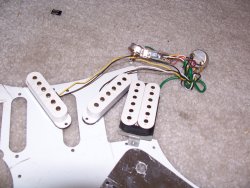
Here's the pickups and electronics. Not too much to talk about. The pickups are "vintage" type because the pole pieces are different heights. The back of the pickguard is visible above, and you can see where the control cavity has tin foil shielding tape on it. This guitar came with 500K pots and a .223 cuf capacitor. I'll be testing all of the components before reusing them, but so far the only component I won't need is the capacitor (I use the cuf capacitor recommended by Seymour Duncan), and I don't like the 5 way selector switch, so I'll replace that....
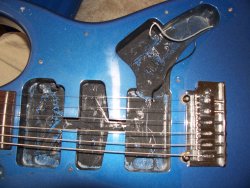
Another shot of the cavity. The black wire is the body ground that wraps underneath and attaches to the tremolo mechanisms on the back of the guitar. The white shielded wire is to the output jack.
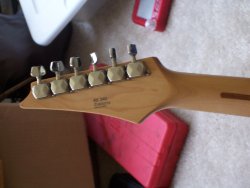
Here's the back of the headstock, with the model number and serial number visible.
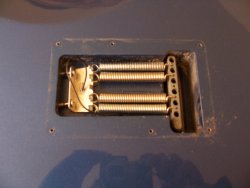
It looks darker than it is, but the body is blue. This is the tremolo mechanism, and you can see the black body ground.
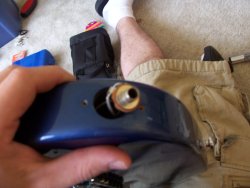
Here's the output jack, after taking the cover off....
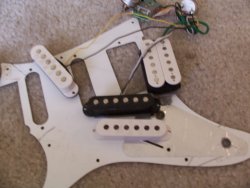
Here's a shot so you can see the pickup cover off of the pickup. I could not find model / serial numbers anywhere on any of the pickups. TRULY generic :)
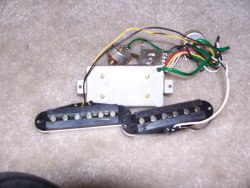
Here's a shot of the back of the single coils. Somehow with the way the back looks, I doubt the magnets are "fully wound" all the way around like they ought to be.
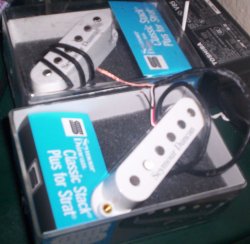
The Classic Stack Plus pickups from Seymour Duncan arrived on 09 May 2006. I can't wait to put them into my guitar!
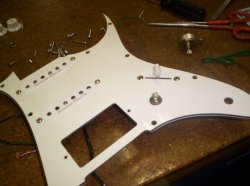
Here's where I had started physically assembling the pieces after desoldering. I prefer to solder the objects while they are installed, so that they don't move around while I'm trying to solder. Think easier and the soldering won't be so hard. My bridge pickup hadn't come in yet.
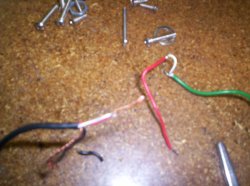
This is me demonstrating solder prep. Do NOT put the white and red on a classic stack pickup together! That was my mistake. However, I'll go through the basic soldering of things together process. You first strip an equal amount of wire off. Then you twist the wires together. Yes, I know that this isn't the most perfect way, but it's sufficient. Solder flux is recommended because it "pulls" the solder into the wire and also helps clean the wire.
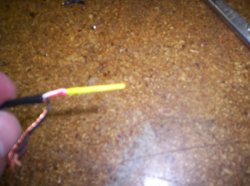
Next, you take the soldering iron, put solder on it (a ball of molten solder, the size of a BB, should work), and then touch the wire to it, allowing the solder to spread and soak into the wire splice. I prefer to have the solder on the top of the tip of the iron and then put the wire on top of that, so that I'm allowing the solder to flow to the wire, not trying to dab solder onto the wire. Just my preference.
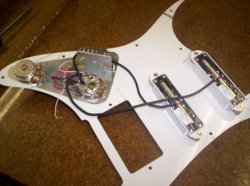
Here's as far as I got. I'm awaiting my bridge pickup. I don't know how the Ibanez 5-way switch operates yet, so I'll have to get online and find out. Going by the directions included with the classic stack pickups, black and bare wire are grounded (to a pot), red is left isolated (so I put heat shrink on the red ends), and white is the hot output that goes to the 5-way switch. It's obvious that the Seymour Duncan pickups are manufactured to a higher quality level than the stock pickups. This guitar already had 500K pots, so I left that alone. However, I removed the capacitor, as it was .0223 cuf rated. The Seymour Duncan diagram shows that you should use .047 cuf rated capacitors.
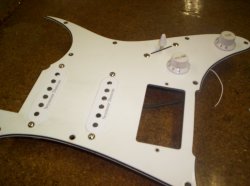
Here's how the top looks so far, with the components mostly installed. I left my pickups flush with the pick guard because I'll be putting them back into a guitar that has the strings loose only, not removed. I used the Seymour Duncan pickup hardware (screws and rubber bushings). Gotta love the look of the Seymour Duncan logo!
12 May 2006
After reading about how guitars ought to be shielded and such, I bought some conductive shielding tape and some conductive paint. I will be revamping things slightly in order to get my guitar shielded properly. More to come.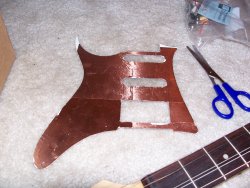
16 May 2006
Here's what the back of my guitar's pickguard looks like after putting the conductive (shielding) tape on it. Most the control cavity holes aren't cut yet, but this is ok because you want the screws and such to ground against it. Most of this means that you don't really have to run a wire for grounding from one control piece to the next because they're already grounded together.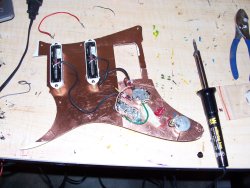
Here's the guitar's pickguard and control devices after reinstalling them and running more lines. I was lucky enough to find a schematic of the original 5-way switch here, as the new Fender 5-way switch I bought was too big to fit into the guitar, and I didn't feel like buying wood tools to enlarge the cavity.
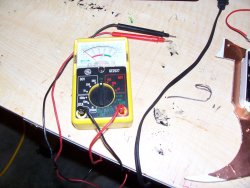
Here's my multimeter. I don't have the money to own a nice Fluke digital multimeter like my work buys, but this does fine. It's analog. This is very good for checking to see if the grounds are good. Basically, the metal body of all of the control pieces, i.e. pots, switches, should be 0 ohms or very close to that. This means that they are all grounded together. As for the switch operation, you can also check that by checking continuity from the pickups (which you can see the solder point for the output line from here) to the volume pot based on switch position. Mine checks out fine.
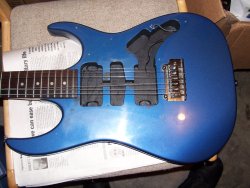
Last, here's the body of the guitar. I had applied conductive paint to the interior cavities not long before I took this picture. The first coat wasn't satisfactory (around 400 ohms), so I put on another and this time I was much more liberal with how much I was using. Hopefully this time it will be closer to zero. If you notice, I painted "outside the lines" once or twice accidentally. However, this might help the pickguard shield well to the body cavities, so I left my mistakes alone.
Update, 21 July 2006
So I went and got a white TB-4 locally before I left TDY. I installed everything and it didn't sound right, so I took it to Leitz Music. They fixed my wiring. It sounds very nice! The Classic Stack Plus pickups have single coil sound but aren't underpowered. The JB sounds nice, but a bit bright for this guitar. I backed the pole screws down on the JB but it still sounds a tad bit bright. But the split sounds wonderful! Sounds truly single coil. As for balance between these pickups, it's ok. The JB in humbucking mode is very loud, so usually when playing I am either splitting the JB when using it with the other pickups, or using it in humbucker mode when it's by itself.But installing the pickups was horrible. I should've taken it to someone who is experienced in wood working. Instead, since it's a cheap guitar, I took it to the wood hobby shop on base and routed out the cavities, then tried rewiring it myself. Not good, and the Ibanez 5-way switch sounds like it's just "wrong" on position 4. I plan to replace that switch and rewire the guitar.
My plan is that when I get a chance, I will have push-pull pots put in rather than the switch for the JB, with chrome "rhoadie" knobs, and instead of 500K, I'll use 250K, based on a friend's recommendation.
So what did I learn? Have a professional modify your guitar, or make sure you do it properly rather than trying to save time to get it working at the last possible minute.
FOR SALE! 9 December 2006
Yes, time to sell it. I got such a sweet deal on a Fender Lite Ash Stratocaster that this frankenstein has got to go. Over time the JB was too bright but the Classic Stacks too undefined in sound. I got a CC put in it, and it sounds nice, but still, it's time to go. Here are some pictures. Asking price for this guitar, with case, is $100 or best offer. Click them for the much bigger image (warning: bigger images are around 500k in size and 1544x2080 in size).![[Image]](../images/100_9563a.jpg)
![[Image]](../images/100_9564a.jpg)
![[Image]](../images/100_9565a.jpg)
![[Image]](../images/100_9566a.jpg)
![[Image]](../images/100_9567a.jpg)
![[Image]](../images/100_9569a.jpg)
23 March 2007
I decided instead, since the guitar does not sell, to retrofit it with three Seymour Duncan Alnico II Pro Staggered pickups (from a Lite Ash Stratocaster) and keep the Custom Custom in the bridge. I'll take pictures and sound clips before I give it away to a friend of mine who doesn't own a guitar.28 August 2007
So far my friend loves the guitar. He's not too keen on single coil pickups, but he loves the Custom Custom bridge pickup. I don't blame him: Seymour Duncan always makes quality products.Credits
Fender, Stratocaster, and Ibanez are trademarks of their respective companies. Seymour Duncan, Basslines, and the stylized "S" logo are all registered trademarks of Seymour Duncan Pickups, with which I am not affiliated.


