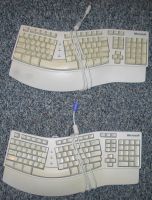
There's a time in every computer-user's life when their trusty keyboard just doesn't have the same snap it did when it was new...Or maybe the keyboard types too many characters every time you hit certain keys...Or exhibits some other flaky behavior. It may be time to run your keyboard through the dishwasher.
Why would someone run a keyboard through a dishwasher? Well, how else do you expect it to get clean? :) The dishwasher does a great job of cleaning out disassembled keyboards, but I was curious to see how an assembled keyboard would fare in the dishwasher. I was also curious if the keyboard would survive and function after a ride through the dishwasher. So, I decided to embark on my own little experiment.
The goals of this page are three-fold:
Two Microsoft Natural Elite keyboards were abducted from my workplace for the experiment. They were going to be pitched, so I saved them in the name of science before they made it to the trash. :) Both keyboards exhibited similar symptoms: occasional double characters, more than one character being typed for certain characters (pressing "j" would net you an "hj" or a "jk"), general grungy/creaky/chunky/sticky feel, the sound of things rattling around inside the keyboard and looking worn or dirty.
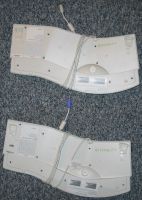
One keyboard was labeled "disassembled," while the other was labeled "assembled" to keep things straight. I realized after the fact that the keyboard slated for disassembly had a white PS/2 plug, while the keyboard destined to weather the dishwasher's fury fully-assembled had a purple PS/2 plug. The keyboards were marked on the rear panel.
 |
 |
 |
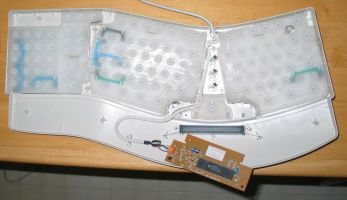 |
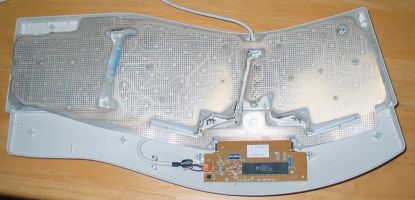
Essentially everything that doesn't carry electricity and won't easily melt can go in the dishwasher. Out of these particular keyboards the only things I didn't put in the dishwasher were the trace sheets, the rubber sheets, the PCB, the LEDs and the screws. Everything else (the key sections and the two halves of the cases) goes in.
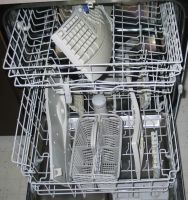 |
On top is the whole keyboard. I decided to give it the less-harsh ride in the top rack cause it has more sensitive parts.
I usually wash the "hard parts" in the dishwasher with detergent. However, since I was experimenting with a whole keyboard I opted to not use detergent. I also interrupted the dishwasher's heat-drying cycle before it started to save the keyboards the pain of the dishwasher's Death Valley-like heat.
I let the whole keyboard dry for two whole days. The disassembled keyboard I probably could have assembled only a day later, but I chose to wait an extra day to be on the same schedule as the assembled keyboard. I stood the assembled keyboard up in our dish drying rack, along with other assorted dishes. I laid the disassembled keyboard's parts out on the kitchen table to dry.
 |
It's been suggested that I could have tossed the keyboard in the oven for some time, but I decided against doing so. Drying keyboards may be fodder for another great experiment at some point, however.
Reassembly is essentially disassembly in reverse. I had to take mine apart after it was mostly stacked back together because I forgot to put the PCB in where it should go and route the wire out through the top of the keyboard, which needs to be done before the rubber sheets get installed (particularly the rubber sheet that handles the space bar).
It also helps to have a way to support the keyboard off the surface you're working on to keep the weight of the keyboard from pushing the keys out of their holes or making it difficult to keep the rubber sheets and trace sheets in place. I used the bottom half of the keyboard shell with the legs sticking up to support the front of the keyboard and a small bottle (a bottle of bay leaves from the spice rack) to support the rear of the keyboard during reassembly.
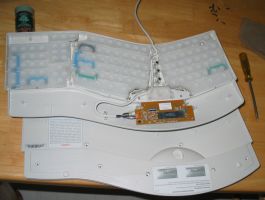 |
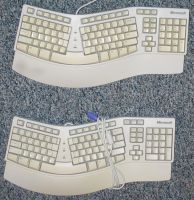 |
I tested the keyboards by flipping my KVM switch to a channel without a machine on it, unplugging my regular keyboard, plugging in the keyboard to be tested, changing my KVM switch back to the channel with my main machine on it and seeing if it worked. Eventually I power-cycled the machine to clear up some nagging issues I had with the keyboards after I changed keyboards. How did the keyboards work? Not as well as I had hoped.
I expected the disassembled keyboard to work without any problems. It didn't. I had a similar problem in the past and I solved the problem by loosening all the screws on the keyboard, moving some things around to make sure they were seated properly and tightening up the screws again. After the on-the-fly keyboard rebuild the disassembled keyboard worked flawlessly. No keys stick any more, I don't get any double characters and the overall grungy/sticky feel of the keys is gone. I consider the disassembled keyboard a success.
The assembled keyboard surprised and disappointed me. Not only did most of the existing problems not go away, more key errors reared their ugly heads. The double-letter problem with some keys was still there. An interesting new problem showed up: when I would type an "i" I would get an "e". Why? I don't know. Also, the entire row of keys on the bottom right side of the "main" section of the keyboard (the row with alt, windows, the "right click" and control keys) stopped functioning entirely. The only improvement was the feel of the keyboard and unfortunately that didn't matter all too much to me. The assembled keyboard is a failure...Not as far as science is concerned, but as a keyboard.
I'm guessing that the water somehow damaged the trace sheets or the conductive traces themselves on the trace sheets. PCBs generally don't have any problems going through the dishwasher as long as no components get dislodged from the PCB; I don't believe anything came off the assembled keyboard's PCB simply because it was enclosed and protected from the brunt of the dishwasher's fury.
It's been suggested that some water probably worked its way between the trace sheets and is causing problems. Supposedly if I let the keyboard dry out for a good, long while it should function properly again. I don't think I'm going to keep it around long enough to find out.
I could probably disassemble the assembled keyboard and try to determine the origins of the keyboard's problems, but honestly I'm just not up for the challenge. :)
What are the participants' fates? The fully-functional, reassembled keyboard will go to a needy computer-user somewhere close to me, hopefully to live out the rest of its days in good service. Maybe it'll even see another trip or two through the dishwasher if the need arises. The assembled keyboard, however, will not be so lucky. I've been thinking about what to do to it. I've thought about testing my Jeep's keyboard-climbing capabilities by tossing the keyboard in the street and driving over it repeatedly, but most likely it will end up, whole, in a landfill to pollute the environment for millennia to come.
Other keyboards may perform differently. Some keyboards won't like a dishwasher bath, particularly those keyboards that use contacts embedded in the rubber sheets, etc. I've heard success stories from IBM Model M keyboard owners indicating that their keyboards often enjoy a trip through the dishwasher every now and then with no ill effects.
Remember, send your keyboard through the dishwasher at your own (personal, physical and financial) risk. I'm not responsible if a dishwashed keyboard doesn't function properly, destroys your PC, nukes the Eastern Seaboard or impregnates your sister. You're on your own.
Page created 20031120 00:23.
Page modified 20031123 04:48.
Comments? Suggestions? Send them to hemi@puresimplicity.net.